Create different shipping zones on your Linker.store
Ecommerce
206 week ago — 5 min read
Shipping zones are a critical part of logistics and order fulfillment on an eCommerce store. It is important to set it up to define locations to which orders can be delivered. Each shipping zone will have a different cost and estimated delivery time for the customer.
On your Linker.store, you can set up and customise multiple shipping zones, each one offering different shipping costs and payment options. In this guide, we will walk you through this process.
Note: Before you start creating shipping zones for your online store, ensure you have completed your store setup.
Steps to create shipping zones
STEP 1
Log in to your GlobalLinker account
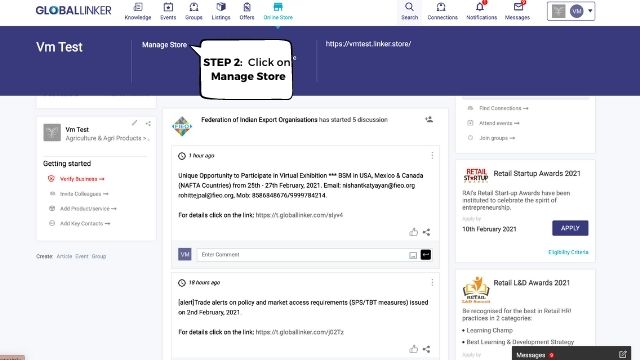
STEP 2
Click on the Online Store button on the top menu. You will see a dropdown. Click on Manage Store to open up your Seller Panel.
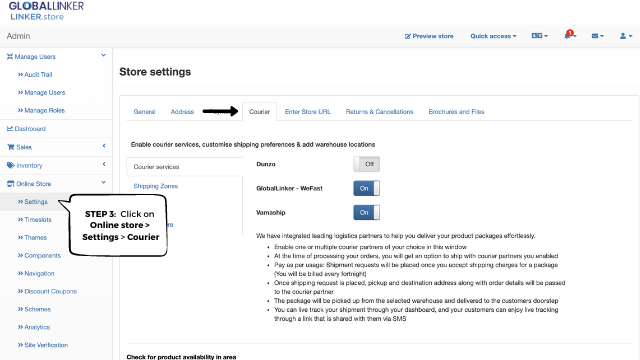
STEP 3
In your seller panel, on the left bar, click on Online Store > Settings > Courier tab.
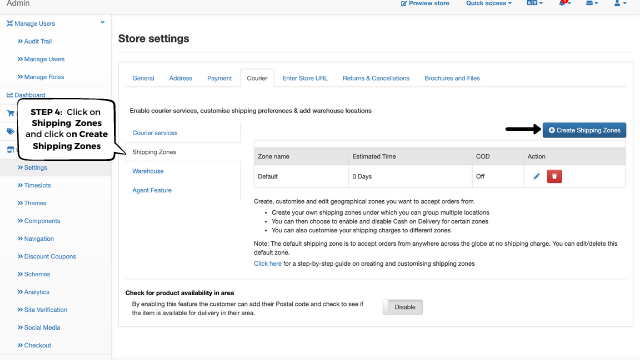
STEP 4
On the Courier tab, click on Shipping Zones and click on the Create Shipping Zones button on the right.
STEP 5
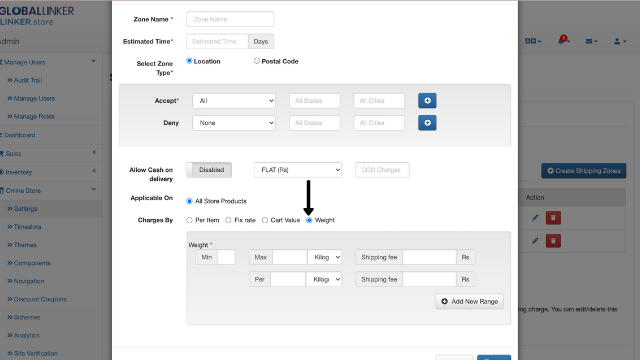
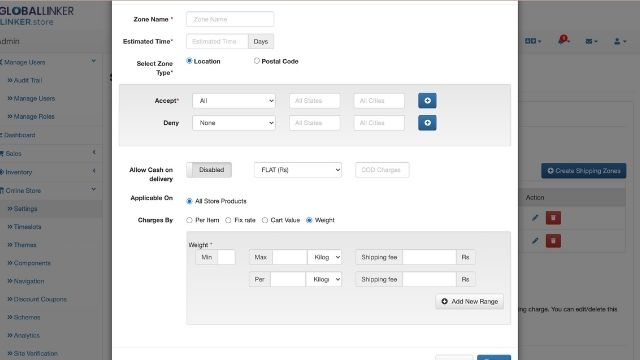
Fill in the fields, as explained below.
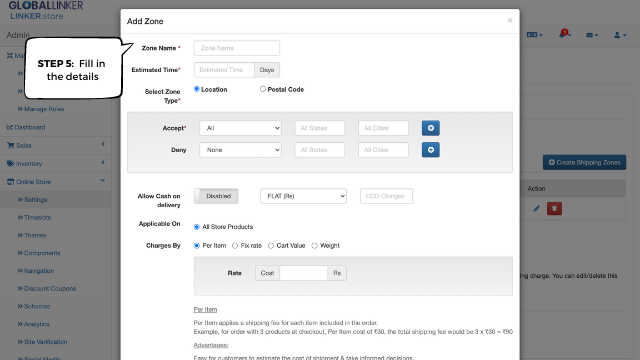
Zone Name: Name your shipping zone appropriately under the Zone Name field. For example, ‘domestic,’ ‘within the city,’ ‘international.’
Estimated Time: Enter the Estimated Time for delivery to be shown to your customers for this zone.
Select Zone Type: Select a geographical area, which can be added in two ways:
(i) Location (Countries, States, and Cities) - Select Location, select State Name from the dropdown list, and add a list of Cities where you want to deliver your products.
(ii) Postal Code – This is used to select parts of a city or for hyperlocal deliveries. Select ‘Postal Code’ and add a list of all postal codes to be included in this shipping zone. The codes can be separated by a comma or added in a new line.
Note: If you want to restrict orders from any particular city, you may follow the same process in the ‘Deny’ list.
Allow Cash on delivery (COD): Here you can enable the COD option. You also add cash handling charges. The next drop down has two options: flat (Rs) and percentage (%). Select one based on your preference and add the price or percentage on the next tab.
Note: If COD is disabled on your payment settings, your customers will not be able to see the COD option for checkout.
Applicable On: Select All Store Products.
Charges By:
A. Per Item: This option is to add a flat charge for each item in the cart during checkout. E.g., If a customer has 3 products and the per-item shipping fee is Rs. 50, the total shipping fee will be 3 x 50 = Rs. 150
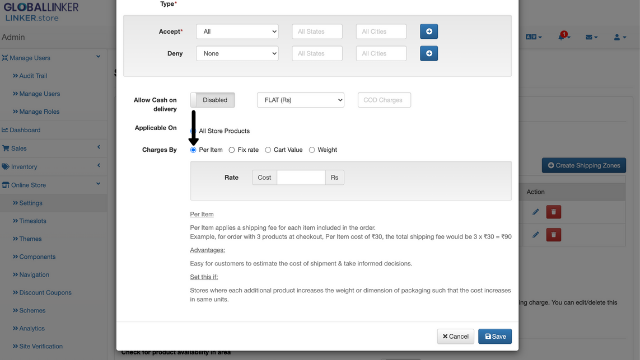
B. Fix rate: This is to add a flat shipping rate. In this case, no matter how many number products you buy or how much your cart value or weight is, the shipping charge will be the same. Whether your cart value is Rs. 500 or Rs. 2000, if you have set a fixed-rate at Rs. 50 for shipping, it will remain so.
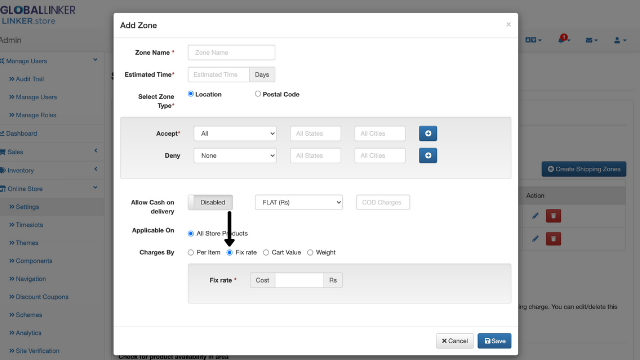
C. Cart Value: This is to calculate a shipping fee calculated based on the cart value. With this rule, you can incentivize customers to spend more by discounting shipping fees for higher-value purchases. Add cart value ranges with the respective shipping fees.
E.g., A cart value of up to Rs. 2,000 can have an Rs. 50 shipping fees; while for Rs. 2,001 and above, you can offer free shipping.
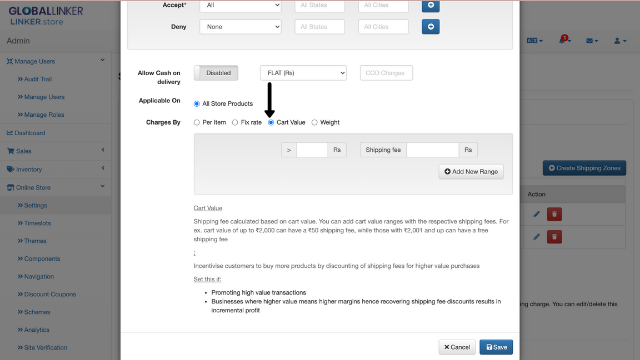
D. Weight: This option allows you to charge a shipping fee based on the weight of the order. Add different ranges of cart weights and the corresponding shipping fees. The final fee will be calculated by summing the total weight of products in the cart. Before you select this option, ensure you have updated the weight of each product variant.
STEP 6
Click on Save. And your shipping zone will be ready!
Note: Your default shipping zone offers free shipping to all areas across the globe. This can be changed as per your preference.
The next step is to add your warehouse address, learn how to process your orders online, and then package it for your logistics partner. Learn how.
For further assistance, write to us at ‘info@linker.store’ or call at +91-22-48931736.
Also read: A step-by step-guide to creating your own eStore with GlobalLinker
Image source: Shutterstock.com
Posted by
GlobalLinker StaffWe are a team of experienced industry professionals committed to sharing our knowledge and skills with small & medium enterprises.
View GlobalLinker 's profile
Most read this week



Comments
Please login or Register to join the discussion